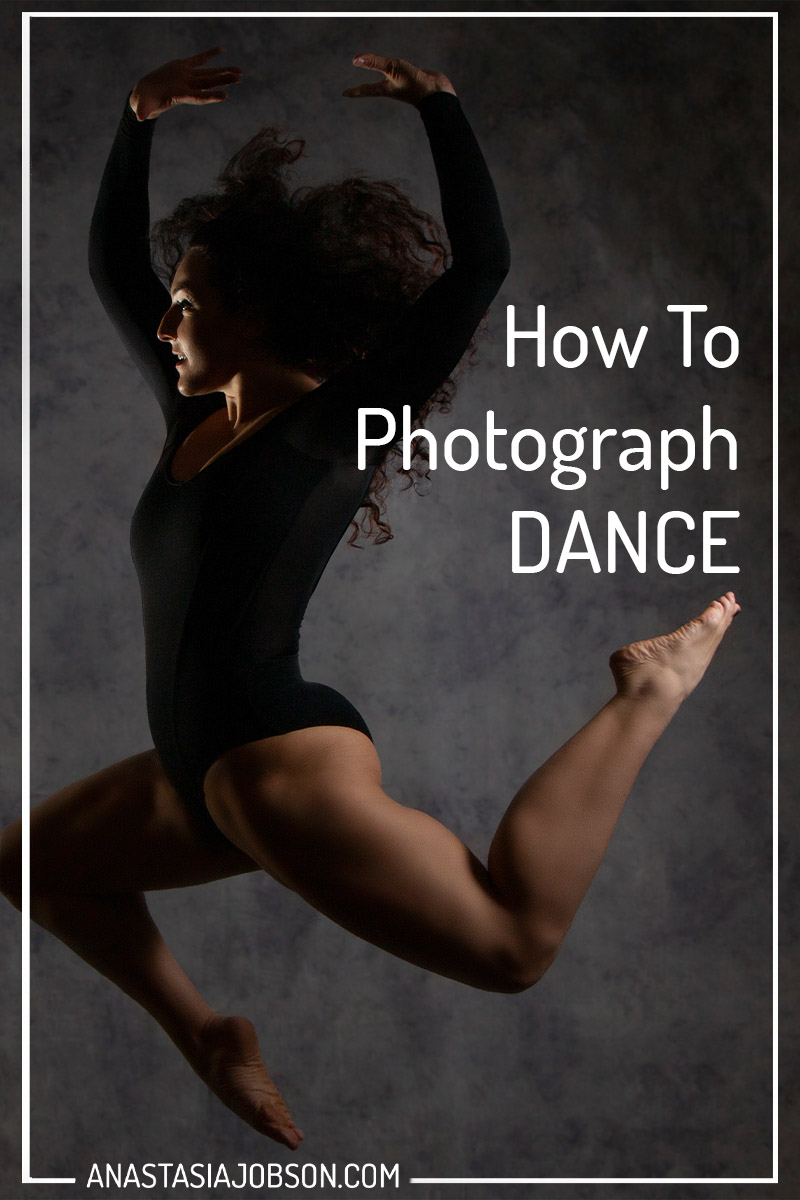
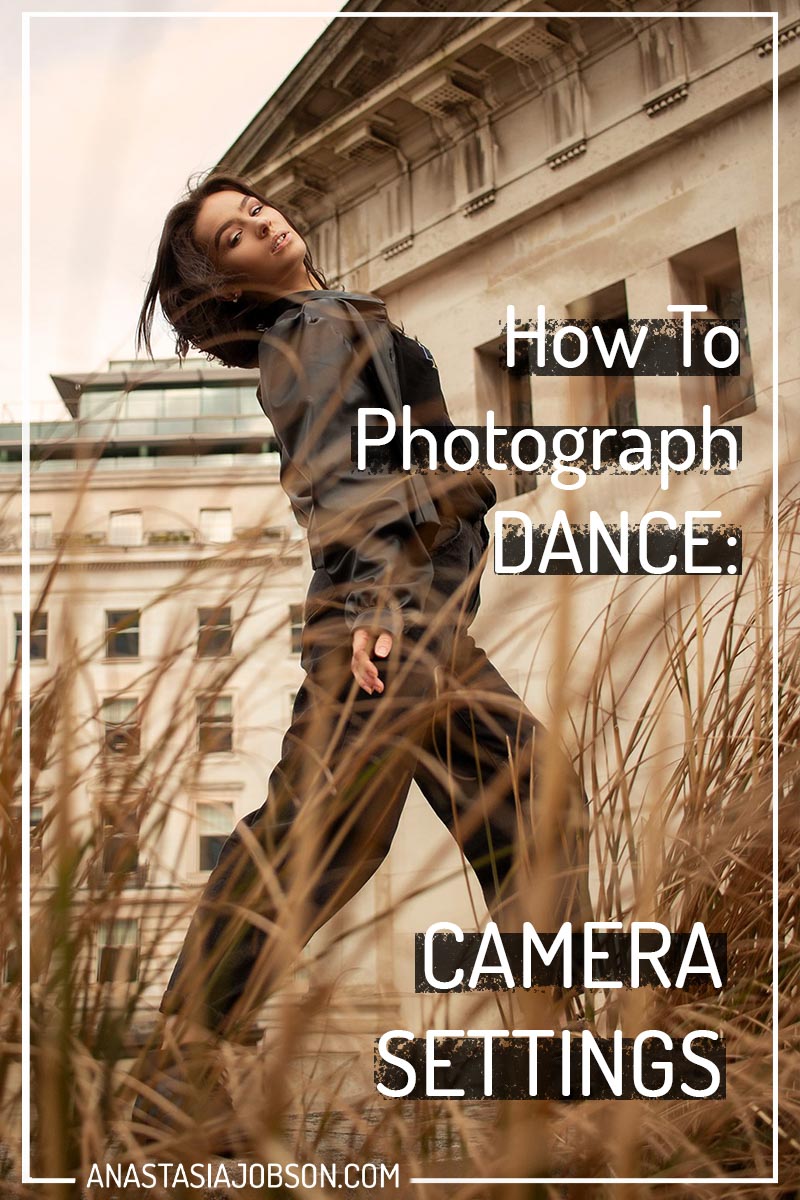
Camera Settings for Dance Photography
Do you like dance? Would you like to learn how to photograph dance and create breathtaking images? Then you came to the right place! Today we are talking about camera settings for dance photography.
To me, dance photography is the same as portraiture but in action. It can be challenging, especially if you are a perfectionist like me. (A random hair in the face, awkward facial expression or any other little detail that feels a bit off, makes me retake an image again and again.)
In this little tutorial we will focus on the technical aspect of photographing dance, which is camera settings. Let’s put aside composing your outdoor dance photos, posing dancers for photos, and timing when to press the shutter, as to me it’s a skill that takes time and a lot of practice. Also don’t forget about patience!
Let’s go!
CAMERA SETTINGS for dance photography:
If you’re still shooting in AUTO, please stop. You’re limiting your creativity enormously. Don’t hand over all of your creative power to your camera and it’s limitations.
Be in control of every photo you take, use MANUAL! Add your personality and style to your RAWS!
SHUTTER SPEED
When I was starting out photographing dance the hardest thing was figuring out the right shutter speed for each and every movement.
A year ago a lot of my images came out looking remarkably average. The main reason was the SHUTTER SPEED. It wasn’t fast enough to freeze everything but also wasn’t slow enough to create a nice motion blur.
So this leads me to my first point. There are 2 WAYS you can approach dance photography: freeze the movement or creatively blur it.
Use a faster shutter speed to freeze motion and slow to get a motion blur. (Learn from my mistakes, and go all in!) In a theory it’s simple: the faster the movement you’re photographing the faster shutter speed you’ll need to freeze it.
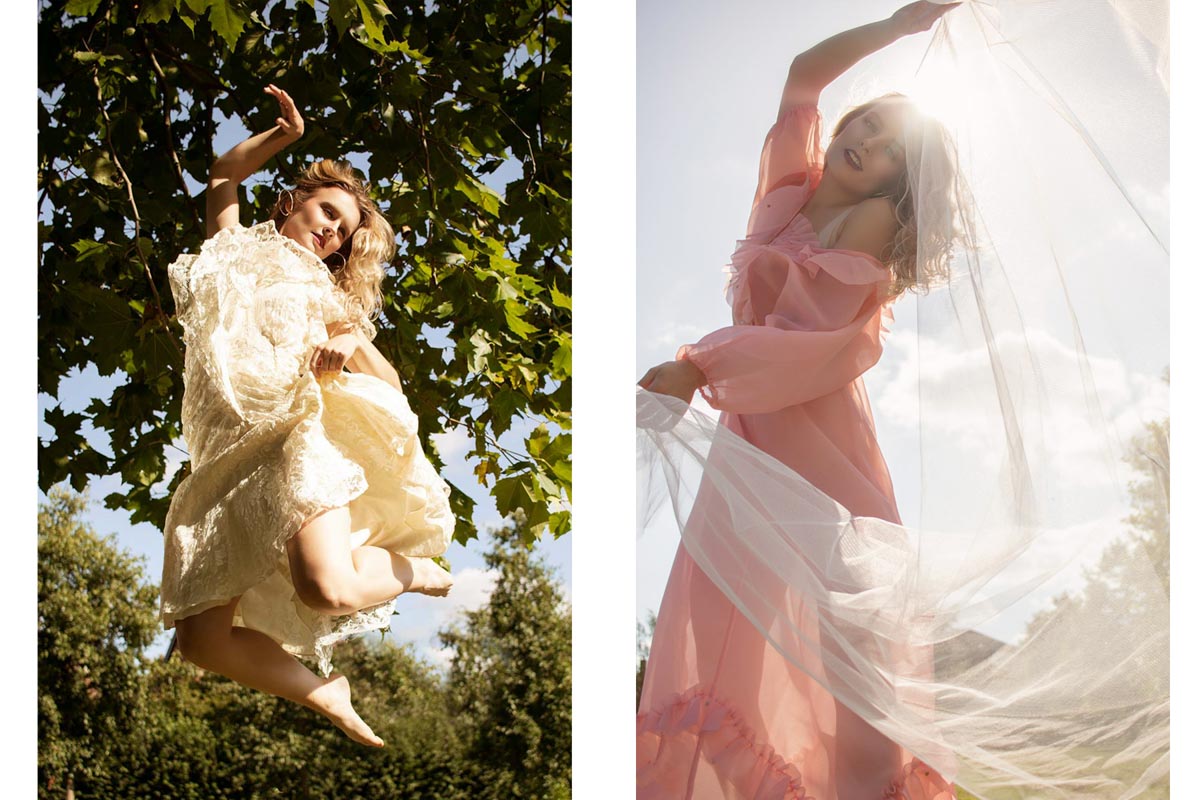
FREEZE MOTION
To get a crisp and super sharp dance image, alter your camera settings to at least 1/500s shutter speed. This shutter speed is great if you’re shooting fast movement such as jumping or running. When I’m shooting outside and there’s plenty of natural light this is my go-to setting to make sure everything is super sharp in my images, including flowing light-weight clothes.
Just for your reference, with a shutter speed of 1/2000s you can freeze any human movement. So, if it’s a clear bright day, your can go for it!
When you’re shooting INDOORS, however, or there’s simply not enough light available, you need to be more sensible with shutter speed. While having a fast shutter speed you wouldn’t want to sacrifice the quality of your images. With higher shutter speed you also need to boost your ISO, which leads to grainy images if you overdo it. So you need to make smart decisions.
For example if you’re photographing slow movement, such as swaying or walking: 1/250s or 1/320s will do the job. Make sure you keep your ISO low.
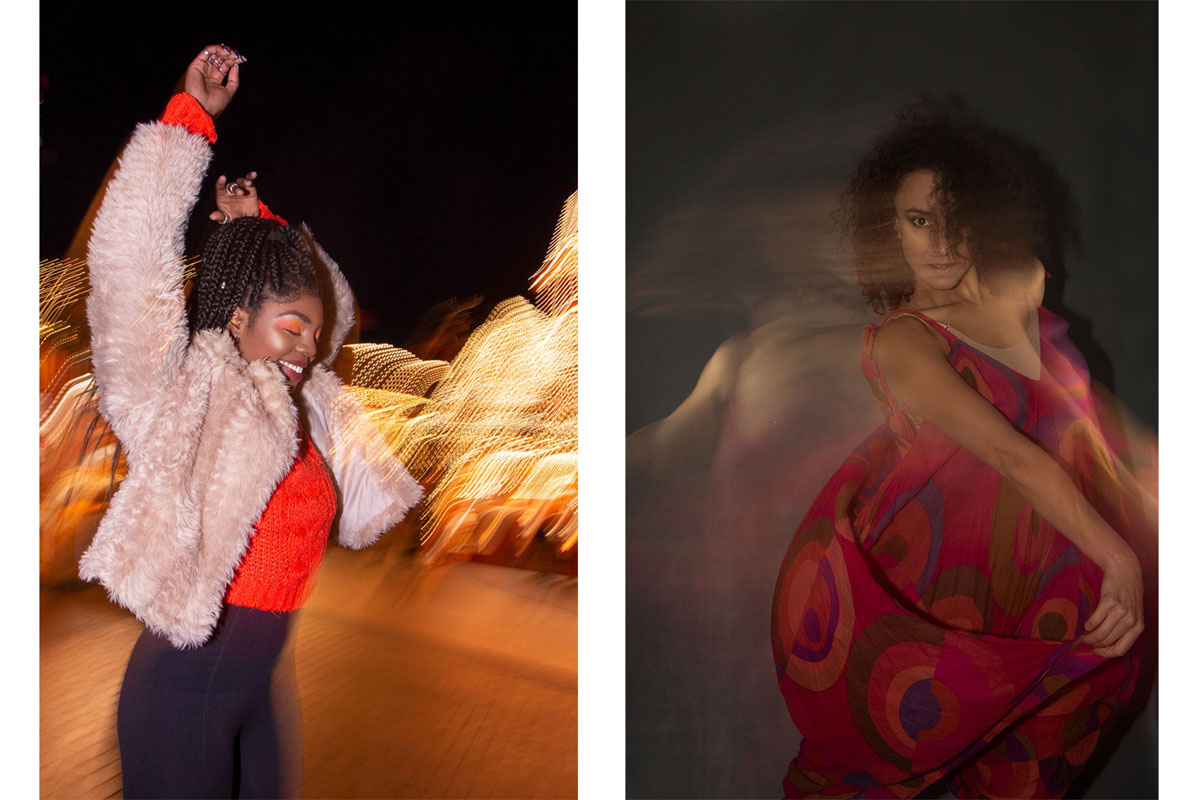
MOTION BLUR
For a creative MOTION BLUR in your dance images, set your shutter speed to 1/100s or slower. Again, it all depends on how fast your dancer is moving and how much or a blur trail you want.
You need to be very careful when holding your camera with your hands, unless your camera or lenses have built-in image stabilisation. Any camera shake might affect the final images. The best way to eliminate any camera shake is to mount your camera on a tripod/monopod and use a remote control to press the shutter.
PRO tip! Have a simple and clean background, so your images don’t get too busy. Have your dancer as focus of attention, let them stand out.
Another way to photograph dance with a sense of motion in the images, is to move along with the dancer. Pan your camera in the direction of the movement. This way the background will turn into a blur while the dancer is still in focus.
Right: Fleur Hall
APERTURE
If you’re just starting with action and dance photography, I would recommend to go for a higher F-stop to start with. It’s great because it lets you play safe with the focus (we will discuss how to focus on a moving object in a minute) and nail it every time.
I personally like going up with the aperture (F6.3 and higher) to get the whole scene very focused and sharp for some images. A great location for this would be a graffiti wall.
If you already feel confident focusing on a moving object, go ahead and dial the F-number lower (F2.8- F1.2, depending on the lenses you have). Shallow aperture will separate your subject nicely from the background. The background will be blurry which will really make your subject stand out.
FOCUS
Manual focus is quite hard when photographing moving objects, go AUTO!
My favourite way to focus on movement is using manual selection of AF-zones on the back of the camera. I think about the composition before pressing the shutter. I select which the part of the screen where I want to place a dancer, then I press the shutter halfway to make sure the focus is where I want it to be (mostly a dancer’s face). Then I press the button all the way.
Another useful thing to consider when photographing dance is FOCUS MODES. There are 2 modes suitable for capturing movement: AI SERVO and AI FOCUS. AI SERVO is a focus mode specifically for moving objects. AI FOCUS is the most flexible mode: if a subject is moving it automatically switches from ONE-SHOT(still subject focus mode) to AI SERVO.
Finally, the most practical tip on how to photograph dance is shoot in CONTINUOUS mode (burst mode) instead of single shooting. Make sure the focus is right, and go ahead press the shutter and keep it held for a second or two. This will help you get a range of frames from a single movement. Get 5-10 images from a single jump instead of making your dancer jump 5 times for you to get just 5 shots. (Their knees will thank you)
This way if you shoot in continuous mode you can have a freedom to pick and choose when it comes to post production.
Are you not sure which camera lenses to choose for dance photography? Check out best lenses for dance photography!
This is all for this week’s blog. Please let me know if you have any questions regarding camera settings for dance photography in the comment section below. Keep your eyes peeled for more tips on dance photography in the next week’s posts!
If you want to learn more about dance photography, check out How To Photograph Dance section in my blog!
Sorry, the comment form is closed at this time.