How to nail the focus for your self-portraits every time
While self-portraits are a fun process, they are often based on trial and error. It can take a bit of effort to get the perfect combination of a great pose, flattering facial expression, and most importantly sharp focus. An auto-focus (AF) face detection is every self-portrait shooter’s dream camera feature. Though most of the newest camera models have it, older models might not. So if your camera doesn’t have outstanding AF, do not despair and check out these tried and tested ways how to focus your camera for self-portraits.
How to focus your camera for self-portraits:
Make sure there’s enough light available
As weird as it sounds, make sure there’s actually enough light for your camera to auto-focus.
For low-key/darker images, your camera’s auto-focus might struggle in a dimly lit environment. There are 3 ways you can focus your camera for a low-key style self-portrait:
Use a speed light
Speed lights have an auto-focus Assist Beam. In low light conditions a speed light will fire a a beam of red light, just enough to help your camera’s AF to lock onto the subject, which in this case is your face.
Add an extra light
If you don’t have a speed light, you can give your camera a little nudge by lighting your face with a constant light. Use your phone’s in-built torch, or an LED ring light you use for Zoom meetings. Get creative! The idea is to add a little extra light to the scene and help your camera focus correctly. The light doesn’t have to be powerful and affect the scene. A subtle light, it will not even be noticeable in the final image.
Bump up your shutter speed or aperture
Did you know that you can make the scene appear to be darker than it actually is for a low-key image: either have a higher aperture (F-stop) or bump up your shutter speed. This way you avoid focusing problem altogether.
Set a reference focus point
This technique is pretty straight-forward. Place an object where you will be posing. A reference object can be a lamp, or a plant, or even a toy. Focus on it and then pose in the exact spot where your stand-in was at.
Switch to MANUAL focus
Many manual lenses (for example old film lenses) have a distance measurement on their focus rings which helps you focus with a distance in mind. Since focusing is only concerned with distance, you can measure the distance between you and the camera and set it on the focus ring. Set your camera on a tripod, mark a spot where you will be posing, focus on it by setting the distance, and strike a pose!
For me a combination of these two techniques works well – setting a reference point, focusing on it with an auto-focus, and then switching to manual focus (most of camera lenses have a AF/MF switch on the side) in order to lock the focus there. Try it, and let me know how it goes!
Use Higher F-stop
If you’re shooting during a bright sunny day, and there’s lots of natural light available, this technique will be perfect for you to make sure your self-portraits are in focus.
F-stop or aperture is basically an opening in a lens through which light enters your camera. How much you open or close the aperture determines the amount of light reaching the camera sensor. The size of aperture also controls depth of field – the distance between the closest and farthest objects in your frame that are in focus.
Opening the aperture, which is determined by a smaller F-number (F2.8/F1.4) will let more light in the camera and give you a more narrow depth of field (or a shallow focus). It will give you a beautifully blurred background, which is called ‘bokeh’. It’s a Japanese term that means “blur quality” and refers to “the way the lens renders out-of-focus points of light“. At the same time it will make it more obvious if the focus is missed. On the other hand, if you bump up the F-number (F8/F16) it will close the aperture, letting less light in the camera and giving you sharp focus from the nearby foreground to the further distance. This way you will make sure you’re perfectly in focus (and your surroundings).
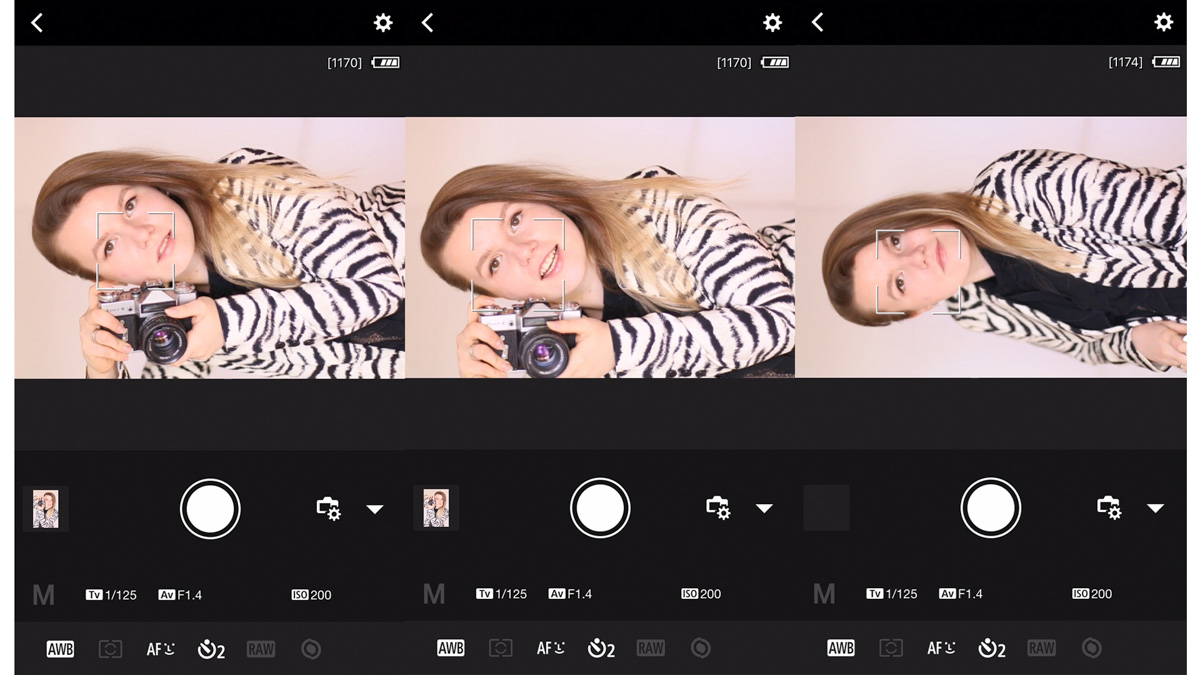
Use a Smart Remote Control
Check if your camera brand has a remote control mobile app. It will let you connect your phone to your camera, wirelessly control the camera settings and take self-portraits.
I usually use Canon Camera Connect app when taking self-portraits on my Canon 70D camera. It’s free on App Store. I love this app as it lets me manually control every aspect of an image – shutter speed, aperture, ISO, and most importantly the focus. For the self-portraits below I set my camera to the widest aperture (F1.4) and still got super sharp results. Crazy, right! You can also tap on the phone screen where you want your camera to focus, and it nails the focus every time.
It took me a while to set it up for the very first time, but since then it’s been always smooth and easy to use – my favourite self-portrait setup.
Regardless of which camera brand or level (beginner, semi-pro, pro) you are using, take your time and get to know your gear. Explore all focusing modes your camera has, chances are there are a few. Remember, it’s all about trial and error and finding what works the best for you.
If you still have any questions on how to focus your camera for self-portraits, feel free to drop them in the comment section down below.
Sorry, the comment form is closed at this time.